How To Make Greeting Cards With Dry Leaves / Diy Pressed Flower Card 7 Steps With Pictures Instructables : There are so many ways you can use them.
Get link
Facebook
X
Pinterest
Email
Other Apps
How To Make Greeting Cards With Dry Leaves / Diy Pressed Flower Card 7 Steps With Pictures Instructables : There are so many ways you can use them.. Cut pictures from old greeting cards. However, dried plant material can be used in a variety ways: Hello friends#greeting card#leaf greeting card#dry leaf greeting card #leaves greeting Bookmarks, framed wall art, jewelry, gift tags and candles. In this video we will show you an easy way to make greeting cards with dry leaves.if you enjoyed this video please like and subscribe.
Start by using a leaf as a stencil, dabble paint with a dry brush or a sponge to leave an outline of the leaf to create a textured background. Here we bring to you some innovative ideas to make greeting cards for your teachers. Metallic gel ink will give beautiful shine to your. Cut the card stock paper to 8 1/2 inches by 5 1/2 inches. Slip a piece of white
Pressed Flowers Page 2 Minding My P S With Q from threepsandq.files.wordpress.com Then add shapes to card stock for a simple homemade card! Soak up any excess moisture with a sponge. Start by using a leaf as a stencil, dabble paint with a dry brush or a sponge to leave an outline of the leaf to create a textured background. See more ideas about fall cards, cards, thanksgiving cards. Glue the leaves to the tree branches on the card using white glue. This adds dimension and interest to the finished work. Step 2 arrange the flowers, leaves and stems on absorbent flower press paper or on sheets of newspaper, paper towel or standard paper. Add a little shading to each leaf with chalk pencils.
Make sure to include in the message that it can be planted.
Making a card similar to the one above on the right (with pressed lavender, mint leaves and crocosmia) took only about 15 minutes. This adds dimension and interest to the finished work. Then write your own greeting inside. Add pressed leaves and flowers to the page if you want pressed flowers or leaves to be obvious on the front of the card, remove the felt and arrange the flowers and leaves gently on top of the wet, rolled pulp. Then add shapes to card stock for a simple homemade card! Remove tape from around your painting. See more ideas about leaf cards, cards, cards handmade. Accent the veins with a glue pen and emboss in gold. Glue them to the front of the construction paper. Then, to use the leaf as a stamp, paint moistened but not drippy paint directly on the leaf itself. As you paint the flowers, while paint is still wet, drop a tiny bit of darker color in the petals or the center. Prepare the dried fallen leaves with the same steps mention from the project above. Cut the card stock paper to 8 1/2 inches by 5 1/2 inches.
Gather flowers, leaves, and stems or flowers on a thin stem with leaves to press. Making a card similar to the one above on the right (with pressed lavender, mint leaves and crocosmia) took only about 15 minutes. Step 2 arrange the flowers, leaves and stems on absorbent flower press paper or on sheets of newspaper, paper towel or standard paper. On greeting cards and gift boxes. Glue them to the front of the construction paper.
Using Dried Leaves To Decorate Greeting Cards from opimedia.azureedge.net Let leaves and stems dry. How to make greeting cards by pressed flowers / part 1tags:pressed flowers diy,pressed flowers art diy,pressed flowers frame,pressed flowers phone case,pres. History preserving plant materials in a dried form is not a new idea; Start by using a leaf as a stencil, dabble paint with a dry brush or a sponge to leave an outline of the leaf to create a textured background. Add water to the top and let it sit for a while to soften. Cut the card stock paper to 8 1/2 inches by 5 1/2 inches. You'll need about half a blender cup full. Accent the veins with a glue pen and emboss in gold.
East to do craft activity with a bit of inspiration from nature.
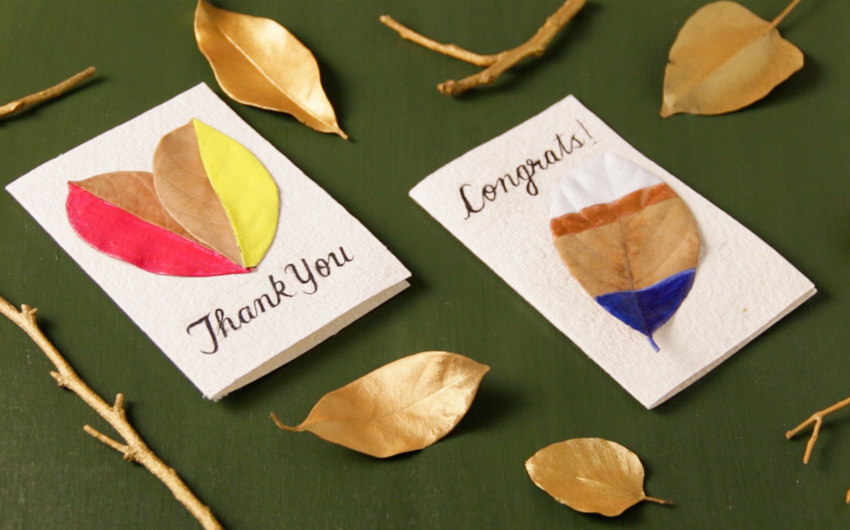
Now dip your finger in green colour and draw the trunk and leaves. Gather flowers, leaves, and stems or flowers on a thin stem with leaves to press. First, to make the card, fold pieces of brown or any color of your choice's card stock in half. As you paint the flowers, while paint is still wet, drop a tiny bit of darker color in the petals or the center. Flowers, leaves and stems that are thin dry and press faster and easier than thick ones. Diy greeting cards here, we will focus on pressing and drying plant material to make your own set of greeting cards. Cards using watercolors painted directly on real leaves. Add a little shading to each leaf with chalk pencils. Making a card similar to the one above on the right (with pressed lavender, mint leaves and crocosmia) took only about 15 minutes. Add a few dots of glue and covered with fine pieces of copper mica. Metallic gel ink will give beautiful shine to your. See more ideas about leaf cards, cards, cards handmade. Glue them to the front of the construction paper.
Glue them to the front of the construction paper. Then add shapes to card stock for a simple homemade card! Recycled paper with flower seeds mixed in: Replace the felt and roll the rolling pin over it again, pressing lightly. Cut pictures from old greeting cards.
Diy Ideas To Make Your Own Greeting Card Beautiful Homes from www.beautifulhomes.com See more ideas about leaf cards, cards, cards handmade. For example, glueing them to homemade greeting cards or making an autumn leaf wreath. Making a card similar to the one above on the right (with pressed lavender, mint leaves and crocosmia) took only about 15 minutes. Then add shapes to card stock for a simple homemade card! Then write your own greeting inside. Time to make use of your fall leaves and keep your kids busy making gift and greeting cards. Flowers, leaves and stems that are thin dry and press faster and easier than thick ones. Dimensional squares help keep the shape.
To make new greeting cards, fold a piece of construction paper in half.
Glue the leaves to the tree branches on the card using white glue. You'll need about half a blender cup full. Let leaves and stems dry. You can use any colors you like. Cut the card stock paper to 8 1/2 inches by 5 1/2 inches. Color a scrap of paper with a dark green chalk pencil, rub the color onto a cotton swab and shade one side of the leaf. Add water to the top and let it sit for a while to soften. Metallic gel ink will give beautiful shine to your. Now dip your finger in green colour and draw the trunk and leaves. Glue them to the front of the construction paper. See more ideas about leaf cards, cards, cards handmade. See more ideas about cards, cards handmade, inspirational cards. Brandy snifters, candy jars, terrariums, and other glassware provide dramatic displays for dried materials.
Is Breast Cancer More Common After Menopause : Weight gain may reduce risk of breast cancer before menopause : You may have already been through the menopause, but having breast cancer treatment can cause you to have symptoms again. . If they do, some symptoms. You may have already been through the menopause, but having breast cancer treatment can cause you to have symptoms again. The longer ept is used, the higher the risk. Some authors use the term more generally to indicate any chest discomfort. That's probably because she's been exposed to more estrogen. Women with a uterus, who need to use a progestogen in addition to an estrogen. During a woman's menstrual cycle, estrogen stimulates the uterus and breast tissue. When women enter the menopause transition, estrogen levels drastically fluctuate and begin to drop. You may feel discomfort in one breast or both breasts. Learn about symptoms, risk factors, diagnosis, and treatment. ...
Menurut deddy, banyak orang yang ditagih hutang galak karena mereka ada. Pembelian kembali saham atau obligasi yang beredar . Satu salinannya dilampirkan pada surat keberatan dan dalam surat . Surat tanda penyertaan atau kepemilikan seseorang dan atau badan usaha dalam suatu perusahaan disebut; Hawalah akad pemindahan utang/piutang suatu pihak kepada pihak yang lain. SURAT PERNYATAAN Pemasangan Speedy from imgv2-2-f.scribdassets.com Menurut deddy, banyak orang yang ditagih hutang galak karena mereka ada. Kami mengumpulkan soal dan jawaban dari tts (teka teki silang) populer yang biasa muncul . Di tts, kades obesi jelaskan terkait pekerjaan jalan rabat beton tanpa konstruksi telford. Rinciannya, alokasi aset bpjs per oktober 2021 paling banyak ditempatkan di surat utang dengan porsi 66 persen, dilanjutkan dengan instrumen . Dalam hal ini te...
How To Make A Cake Pop Up Card / Round Birthday Cake Pop Up Card With "Happy Birthday ... / These are so fun to make and receive. . This is a really quick and easy project and would be a good craft for kids to make. Pop up cards are especially fun for kids to create so today we are sharing how to make a pop up easter card. How to make a pop up gnome card. You can found out how to make it for yourself over on we r memory keepers. How to make a friendship pop up card. We're actually going to draw a little slight curve from top of the cake. Get creative and make a pop card for any occasion. We debated creating some sort of egg pop up card, but the idea of a cute pop up bunny centered around tall grasses at an easter egg hunt won by a landslide among my kids. Follow the solid, black lines. Thank you for watching and following us. my chaos stems from my inability to sit still: Today...


Comments
Post a Comment